Adhesive ceramic tiles are a type of ceramic tiles that are designed to be installed on existing surfaces using a special adhesive. This installation method has many advantages, including saving time and money, ease of installation, and a variety of designs and colors.
The use of ceramic tiles to cover surfaces is ancient and goes back thousands of years. Initially, tiles were traditionally installed using sand and cement mortar. This installation method was a time-consuming, expensive process that required skill and experience.
The idea of using glue to install ceramic tiles was first proposed in the middle of the 20th century. In the 1950s, various companies began producing tile adhesives specifically designed to install tiles on existing surfaces without having to remove them.
The use of adhesive ceramic tiles quickly became popular because it had several advantages, including time and cost savings, ease of installation, and a variety of designs and colors. This installation method was particularly attractive in building renovations and renovations, where minimizing disruption and damage was critical.
During the 1960s and 1970s, technological advances led to the development of new types of tile adhesives with greater adhesive strength and flexibility. This allowed the tiles to be installed on a wider range of surfaces, including plaster walls, cement and uneven surfaces.
Today, adhesive ceramic tiles have become one of the most popular tile installation methods. This installation method is used in a wide range of residential, commercial and industrial projects. The variety of designs and colors of adhesive tiles, along with their practical benefits, make this method an ideal choice for designers, builders, and homeowners.

1950s: Introduction of the first special tile adhesives
1960s: Development of tile adhesives with greater adhesive strength and flexibility
1970s: widespread use of adhesive ceramic tiles in renovation and renovation
1980s: Introduction of waterproof tile adhesives
1990s: progress in tile adhesive production technology and variety of design and color of adhesive tiles
21st century: The use of bonded ceramic tiles in a wide variety of projects and the growing popularity of this installation method

1.Physical state: powder
2.color:Gray
3.Chlorine ion: No
4.Mixing ability: Yes
5.pH: 11
6.Storage conditions: away from cold and heat in a closed bucket
This method is used to install new tiles or ceramics on the surfaces of existing tiles or ceramics without having to dig them up.
Adhesive tiles are an ideal option for restoring and renovating old, damaged or uneven ceramic tile surfaces.
Adhesive tiles can be used to cover uneven surfaces such as plaster or cement walls that are not suitable for installing traditional tiles.
Waterproof adhesive tiles can be used in wet places such as bathrooms and kitchens.
Study proposal : click here for more information about Latex Tile Adhesive and List of tile and ceramic stores in the world .
Save time and money: Installing tile over tile is significantly faster and easier than tearing out old tiles and installing new tiles. This can save you a lot of time and money.
Ease of installation: Installing adhesive tiles does not require special skills or tools and can be easily done by beginners.
Variety of designs and colors: Adhesive tiles are available in a wide variety of designs, colors and sizes that can help you create a unique look for your home decoration.
Washable and waterproof: Most adhesive tiles are easily washable and waterproof and are ideal for use in wet areas such as bathrooms and kitchens.
High resistance: adhesive tiles are made of high quality materials and are resistant to impact, scratches and wear.
Increased property value: Installing new tiles can significantly increase the value of your property.
Restrictions on tile type: Not all types of tiles are suitable for installation on existing tiles. The new tiles should be lighter and thinner than the old tiles to avoid additional load and the possibility of breakage.
Limitation in thickness of adhesive: The thickness of adhesive used to install adhesive tiles is limited and may not be suitable for uneven or uneven surfaces.
The need for a smooth and prepared surface: For the correct installation of adhesive tiles, the subsurface must be smooth, clean and dry.
Choosing the right method for installing tiles is one of the most important decisions in any tiling project. There are different methods of installing tiles, each of which has its own advantages and disadvantages. Adhesive tiles have been one of the most popular tile installation methods in recent years. In this article, we will compare adhesive tiles with other common tile installation methods, including traditional installation with cement-sand mortar, installation with the plank method, and installation with the lock and click system.
Before starting work, make sure the surface is clean, dry and free of any grease, dust, adhesives or contamination.
If there are unevenness or cracks on the surface, use putty or cement to smooth it.
Soak the tiles in water for 24 hours to absorb the moisture.
Choose and prepare the right tile adhesive according to the type of tile, environmental conditions and the manufacturer’s recommendation.
Prepare the necessary tools for installing tiles, such as a notched trowel, leveler and string, spacer, tile cutter, etc.
Using a level and string, mark vertical and horizontal lines to determine where to install the first row of tiles.
Lay the tiles on the floor dry to ensure the final design and fit of the tiles.
If needed, use the tile cutter to cut the tiles to the desired size.
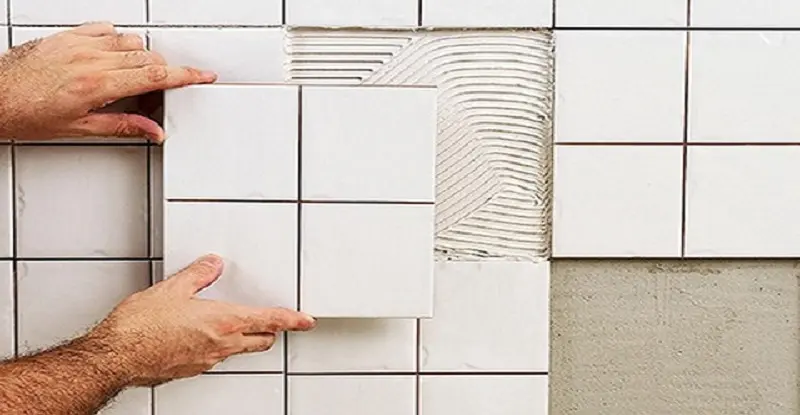
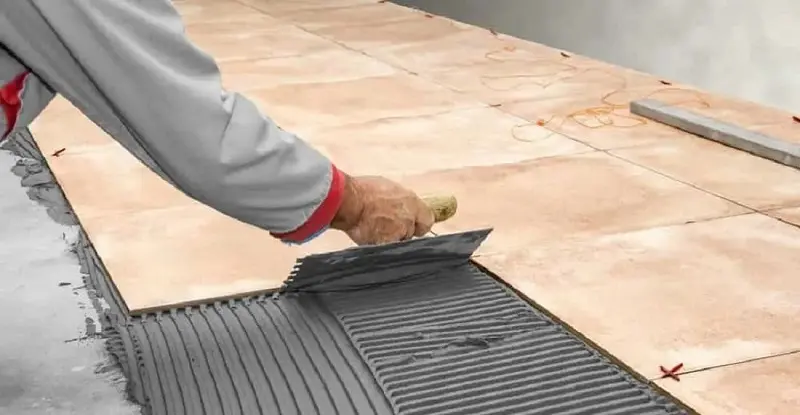
Using a notched trowel, spread some of the prepared adhesive on the underside of the tiles as well as the surface where the tiles will be installed.
The thickness of the glue should be enough to fill the empty space between the tiles and create a smooth surface.
Install the first row of tiles according to the marked lines and using spacers to maintain the distance between the tiles.
Use a level and string to ensure that the tiles are level during installation.
Fix the tiles on the adhesive surface with gentle pressure and tap them until they are completely in place.
Install the next rows of tiles in the same way.
Make sure that the rows of tiles are completely level and the seams between the tiles are the same and regular.
In the corners and side sections, use tiles cut to the desired size.
After 24 to 48 hours of installing the tiles, you can perform the strapping operation.
In addition to being beautiful, proper grouting helps to fill the seams between the tiles and prevent moisture and pollution from entering them.
For grouting, use the appropriate grouting powder according to the type of tile and environmental conditions.
Mix the powder with water to make a smooth paste.
Using a special trowel, apply the joint compound completely in the joints between the tiles.
After the seams are completely filled, wipe the excess surface of the tape with a damp sponge.
Avoid installing tiles at very low or very high temperatures.
Wear goggles, masks and gloves while working to protect yourself from dust and chemicals.
Carefully read and follow the instructions of the tile and adhesive manufacturer.
If you don’t have enough experience, get help from a tile specialist to install your ceramic tiles.
By following these steps and tips, you can install your tiles and ceramics correctly and enjoy their beauty and durability.
It is possible to install adhesive ceramic tiles on plaster, but due to the nature of plaster, special tips and considerations must be taken into account to ensure proper adhesion and longevity of the tiles.
Considerations before installing adhesive ceramic tiles on plaster:
Type of plaster: The plaster used must be of high quality. Low-quality and loose plasters may not bear the weight of ceramic tiles and may crack and fall over time.
Surface preparation: The plaster surface must be completely smooth, level, dry and free from any cracks, unevenness and contamination. Any unevenness or cracks should be smoothed and leveled using putty or cement before installing the tiles.
Primer: To increase the adhesion between ceramic tiles and plaster surface, it is recommended to use a special primer for ceramic tiles. Apply the primer completely to the plaster surface with a roller or brush and allow it to dry completely.
Selection and preparation of adhesive: Choose the appropriate type of tile adhesive according to the type of tile, environmental conditions and the manufacturer’s recommendation. Carefully read and follow the instructions for mixing the glue.
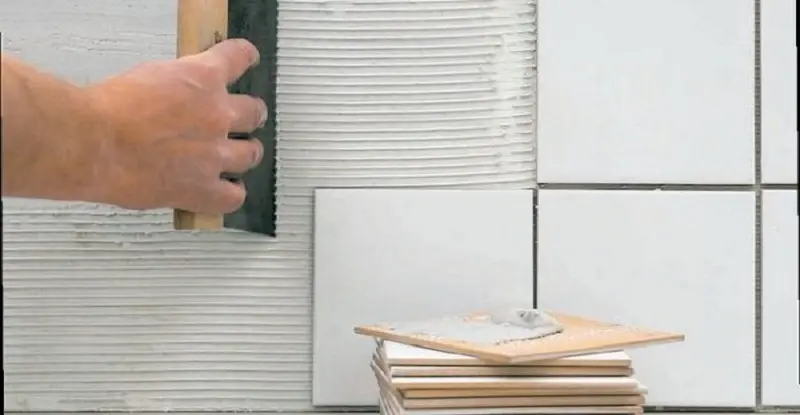
Applying the adhesive: spread some of the prepared adhesive with a notched trowel on the back of the tile as well as the plaster surface on which the tile is to be installed. The thickness of the glue should be enough to fill the empty space between the tile and plaster and create a smooth surface.
Tile Installation: Gently place the tile in place and secure it to the adhesive surface with gentle pressure. Use a level and string to ensure that the tiles are level during installation.
Spaces between tiles: Use spacers to maintain proper space between tiles during installation. These distances are necessary for the expansion and contraction of the tiles.
Fixing the tiles: Use clamps or suitable holding devices to fix the tiles in place for 24 to 48 hours until the adhesive is completely dry.
It is possible to install adhesive ceramic tiles on plaster, but due to the nature of plaster, special tips and considerations must be taken into account to ensure proper adhesion and longevity of the tiles. By observing the points mentioned in this article, you can install ceramic tiles on plaster correctly and in principle and benefit from their beauty and durability over time.
