In the world of tiling, grout plays a critical role, acting as the essential filler between tiles. But it’s more than just a space filler; it’s a functional and aesthetic element that contributes to the overall beauty and longevity of your tiled surface. Here’s a comprehensive breakdown of tile and ceramic grout:
Grout is a fine-grained, cementitious material typically made from a blend of Portland cement, sand, and water. In some cases, additives are included to enhance specific properties like water resistance, stain resistance, or flexibility. When mixed with water, grout forms a paste-like consistency that is ideal for filling the gaps between tiles. Once applied and cured, it hardens to create a solid and durable surface.
Grout plays a vital role in structurally supporting the tile installation. By filling the gaps between tiles, it creates a uniform surface and helps distribute weight evenly across the entire tiled area.
Grout helps prevent individual tiles from shifting or moving, which could lead to cracking in the tiles or grout itself.
Grout acts as a barrier against water infiltration, protecting the underlying substrate (e.g., concrete backerboard) from moisture damage. While not completely waterproof on its own, it helps to reduce water penetration.
Grout comes in a wide variety of colors, allowing you to complement or contrast the color of your tiles. Choosing the right grout color can significantly impact the overall visual appeal of your tiled surface.
Study proposal : click here for more information about stone and ceramic scoop .
Tiles and ceramic grout work hand-in-hand to create beautiful and functional surfaces. But choosing the right grout for your project goes beyond just aesthetics. Here’s a deep dive into the different types of tile and ceramic grout, equipping you to make informed decisions:

There are two main categories of grout based on functionality: sanded and unsanded.
Description: Contains sand particles (typically 1/8 inch or less in diameter) that add texture and strength to the grout.
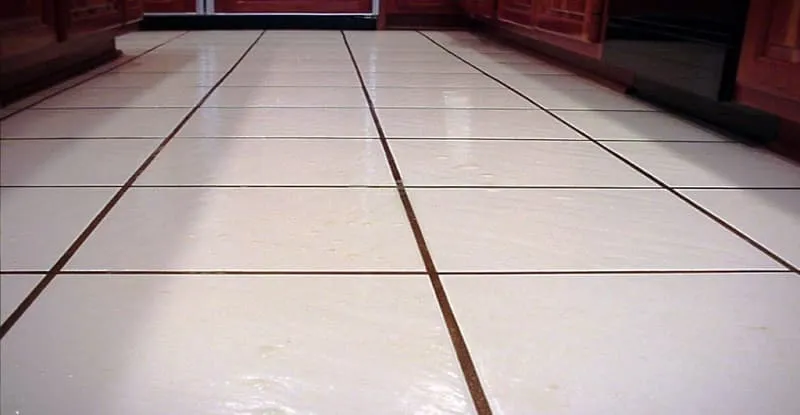
Application: Ideal for wider grout joints (greater than 1/8 inch) commonly found between floor tiles, exterior tiles, and natural stone tiles. The sand particles help bridge the gap and prevent cracking.
Drawbacks: Not recommended for very narrow grout joints as the sand can scratch the tile surface.
Description: A smooth grout without any sand particles.
Application: Best suited for narrow grout joints (1/8 inch or less) typically found between wall tiles, mosaics, and glass tiles. The smooth texture minimizes the risk of scratching delicate tile surfaces.
Drawbacks: May not be as strong as sanded grout for wider joints and might be more prone to cracking.
Beyond functionality, grouts can be categorized by their material composition:
Description: The most common and traditional type of grout, made from a mixture of Portland cement, sand (for sanded grout), water, and additives.
Benefits: Affordable, readily available, and offers good strength and durability.
Drawbacks: Can be susceptible to staining and requires proper sealing after curing.
Description: A two-part grout system consisting of a resin base and a hardener.
Benefits: Extremely strong, durable, and resistant to staining, chemicals, and mold/mildew growth. Often preferred for high-traffic areas, showers, and countertops.
Drawbacks: More expensive than cement-based grout, requires special mixing techniques, and can be more challenging to work with for DIY projects.
Description: A cement-based grout with added polymers that offer improved flexibility, stain resistance, and ease of cleaning compared to traditional cement grout.
Benefits: Combines the affordability of cement-based grout with some of the advantages of epoxy grout, making it a good middle-ground option.
Drawbacks: May not be as strong or stain-resistant as epoxy grout, and some may still require sealing.
Color: Grout comes in a wide variety of colors to complement your tile selection. Consider the overall design theme and desired contrast between tile and grout.
Flexibility: For applications with potential for movement (e.g., floors with radiant heat), a flexible grout like polymeric grout might be preferable to minimize cracking.
Chemical Resistance: If the grout will be exposed to harsh chemicals (e.g., in pools or laboratories), consider epoxy grout for its superior chemical resistance.
Ease of Use: For DIY projects, cement-based or polymeric grouts might be easier to work with compared to epoxy grouts.
Remember: Always consult the manufacturer’s recommendations for specific grout types and their suitability for your chosen tile and application.
Selecting the appropriate grout for your project depends on several factors:
Width of Tile Joints: The size of the gaps between your tiles will dictate whether you need sanded or unsanded grout.
Location of the Tiled Surface: For areas exposed to moisture (e.g., showers, floors), a grout with good water resistance is crucial. Epoxy grout might be a good choice in these situations.
Desired Aesthetics: Consider the color and finish of your tiles when choosing a grout color. You can either match the grout color to the tiles for a uniform look or create a contrasting effect for a bolder statement.
Ease of Use: Sanded grout is generally easier to work with for beginners compared to epoxy grout.
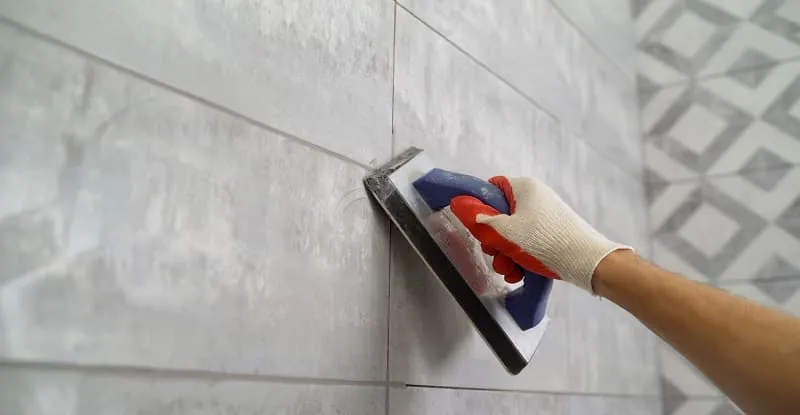
Grouting is typically done after the tiles have been set and the adhesive has cured. Here’s a simplified overview of the process: